Alpha Bracelet Patterns for Beginners: How Horizontal Knotting Works
Alpha patterns arrange knots in a grid so you can knot pictures. Learn how horizontal knotting differs from diagonal patterns, what base and working strings do, and how to knot a plain practice strip.

Tutorial at a glance
Materials
- Embroidery floss in sand and violet
- Scissors
- A clipboard or tape
Alpha bracelet patterns for beginners can look like a different craft from the diagonal stripes and chevrons most people learn first. The knots are the same two half hitches, but they are arranged in a grid instead of on a slant, and that one change is what makes hearts, checks, letters and other pictures possible. This guide explains how the method works, what each string does, and how to knot a plain practice strip before you attempt a design.
What an alpha pattern is
An alpha pattern is a design drawn on a square grid, like pixel art. Every square stands for one knot, and the color of the square is the color of that knot. The name comes from the alphabet: the grid layout was popular for knotting letters and names, and it stuck for any picture made the same way.
Because the knots line up in straight rows and straight columns, a shape drawn on the grid comes out looking the same in thread. In a diagonal pattern the knots sit in a slanted, brick-like arrangement, which is why those patterns produce stripes, V shapes and diamonds but struggle with pictures.

How horizontal knotting differs from diagonal knotting
In a candy stripe or a chevron, every string takes a turn as the working string and then becomes a holding string for its neighbors, so the strings trade places all the way down the bracelet. In an alpha bracelet nothing trades places. A set of strings stays put, and a separate string travels across them, tying one knot on each.
| Diagonal patterns | Alpha patterns | |
|---|---|---|
| Knot layout | Slanted, offset rows | Straight rows and columns |
| Which strings show | All of them | Only the working strings |
| String order | Changes with every row | Base strings never move |
| Row direction | Depends on the pattern | Left to right, then right to left |
| Thread use | Shared evenly | Working string used up fast |
| Chart | Circles with arrows | Colored squares |
The charts differ too. The knot charts described in how to read friendship bracelet patterns use arrows to show the knot type. An alpha grid needs no arrows, because the knot type depends only on which way the row is traveling.
Base strings and working strings
An alpha bracelet has two kinds of string with two different jobs.
- Base strings hang straight down from the anchor and stay in the same order from start to finish. Every knot is tied around one of them. They end up completely wrapped, so they do not show in the finished strip. The number of base strings sets the width: six base strings give a strip six knots wide.
- The working string ties every knot. It crosses the base strings from left to right, turns at the edge, and comes back from right to left. All the color you see is working string. A design with two colors uses two working strings, one for the background and one for the motif.
This is why the working string has to be cut so much longer than the others. It makes two half hitches around every base string in every row, while the base strings only need to reach the length of the bracelet plus the ties.
Tip
Choose base strings close in color to your working string. They are hidden when the knots are snug, but a matching shade disguises any small gap while your tension is still settling.
Knot a first practice strip
A plain strip in one color teaches the rhythm of horizontal rows without any color changes to think about. Use whole six-strand embroidery floss, as for any other bracelet.
Cut and set up
- 6 base strings in sand, each about 14 in (36 cm). This makes a short sampler, not a full bracelet.
- 1 working string in violet, about 60 in (152 cm).
- Scissors, and a clipboard or tape.
- Hold all seven strings together and tie an overhand knot about 3 in (8 cm) from the top.
- Clip the knot under the clipboard clip, or tape it to a table.
- Spread the six base strings flat and side by side. Place the violet working string on the far left.

Row one: left to right
- Hold the first base string taut. Lay the working string over it in a “4” shape, pass it under and up through the opening, and slide the half hitch up to the top.
- Repeat on the same base string. Those two half hitches are one forward knot, and the working string now sits to the right of the first base string.
- Tie a forward knot on each of the remaining five base strings in turn. The working string finishes at the right edge.

Row two: right to left
- Do not carry the working string back to the left. Leave it at the right edge and start the new row there.
- Tie a backward knot, the mirror image of the forward knot, on the sixth base string, directly under the last knot of row one.
- Continue with backward knots on base strings five, four, three, two and one. The working string finishes at the left edge.
Repeat the two rows until you have about 20 rows. A first sampler takes about 45-60 minutes.
Watch out
Keep the base string taut and let the working string do the wrapping. If the base string goes slack, the knot flips: the base string wraps around the working string instead, and its color pops out on the front.
What to check on your sampler
- Edges. The working string makes a small turn at each side. Pull it snug before the first knot of a new row so the turn sits tight against the strip instead of forming a loop.
- Width. Hold the base strings parallel. If they are pulled toward the middle, the strip narrows; if they spread, it widens.
- Rows. Push each finished row up against the one before it. Loose rows let the base color show between them.
- Columns. Look down the strip. Knots should stack in six straight lines, one line per base string.
Expect the first few rows to look uneven. Rows usually even out once your hands stop hesitating at the turns.
From a plain strip to a picture
A design adds one thing to what you just practiced: a second working string in another color. Both working strings travel across each row, and for every knot you follow the grid to see which of the two ties it. Read the first grid row in the direction you are knotting, the second row in the opposite direction, and keep alternating.
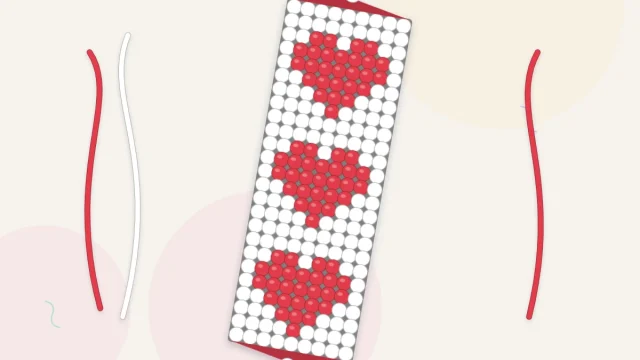
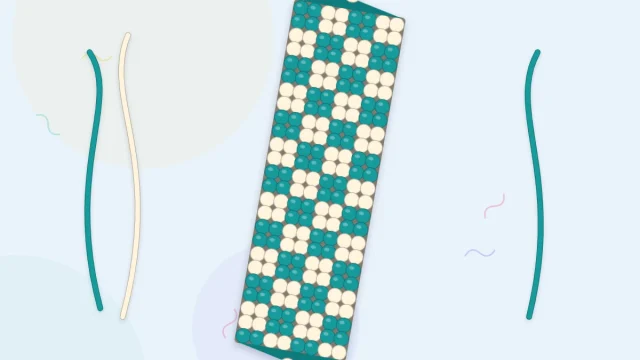
The alpha checkerboard bracelet pattern is built to drill that color change, since the switches land in the same places row after row. After that, the alpha heart bracelet pattern is a small first picture where each row of the grid is different.
Frequently asked questions
Are alpha patterns harder than regular friendship bracelet patterns?
The knots are the same, but alpha patterns take longer and need steadier tension. Most people find them easier once they are comfortable with both the forward and the backward knot.
Why is it called an alpha pattern?
The grid layout became popular for knotting letters of the alphabet and names. The term is now used for any design knotted in straight rows and columns.
Do the base strings show in an alpha bracelet?
No. Every base string is wrapped by the working string's knots, so only the working colors are visible when the knots are snug.
How many base strings should a first alpha strip have?
Six is a comfortable number for practice. It is wide enough to feel the rhythm of a row and narrow enough to finish rows quickly.