How to Start a Friendship Bracelet: Knot, Loop and Braided Loop
Three ways to begin a friendship bracelet, an overhand knot, a folded loop and a braided loop, plus how to anchor the strings with tape, a clipboard or a safety pin.

Tutorial at a glance
Materials
- Embroidery floss
- Scissors
- Masking tape, a clipboard or a safety pin
Before the first knot of the pattern, two decisions shape the whole project: how the strings are joined at the top, and how the work is held still. Learning how to start a friendship bracelet well means picking a top that matches the closure you want and an anchor that keeps the strings taut. There are three common tops (an overhand knot, a folded loop and a braided loop) and three common anchors (tape, a clipboard and a safety pin). Any top can be combined with any anchor.
The three starts at a glance
| Start | How strings are cut | Closes with | Good for |
|---|---|---|---|
| Overhand knot | Each string cut separately at single length | Two tied ends | First bracelets, odd numbers of a color |
| Folded loop | Half as many strings at double length, folded | Ties passed through the loop | Chevrons and other patterns with pairs of colors |
| Braided loop | Double-length strings, braided at the middle | Ties or a button through the loop | Bracelets that will be taken on and off often |
The start affects cutting, so decide before the scissors come out. Lengths for each case are listed in the guide on how to measure friendship bracelet string.
Overhand knot start
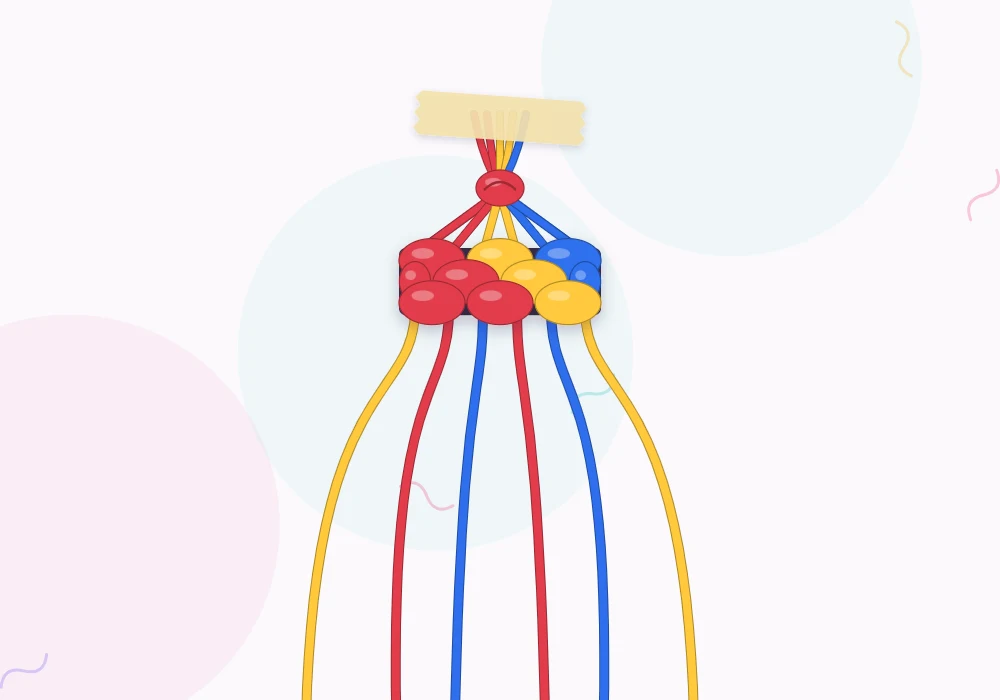
This is the simplest start and the one most first projects use.
- Cut every string to length and line up the ends.
- Hold the bundle together and tie one overhand knot with all the strings, about 3-4 in (8-10 cm) from the top. Those loose inches become a tie later.
- Tighten the knot by pulling each string individually, so no string is left slack inside it.
- Anchor the work just above the knot, then arrange the strings in the order the pattern asks for.
The bundle knot is slightly bulky, so the first row or two of the pattern often looks crowded. It evens out by the third row. For a flatter top, braid the loose section above the knot first, then tie the knot below the braid and begin the pattern.
Folded loop start
A loop gives the bracelet a built-in fastener: the ties at the far end pass through it. It also halves the cutting, because every folded piece becomes two strings.
- Cut half as many strings as the pattern needs, each at double length.
- Hold them together and fold the bundle in half.
- Tie an overhand knot with the folded bundle, leaving a loop about 1/2 in (1.3 cm) long above it. The loop should be just big enough for two braided ties to pass through.
- Anchor through the loop and sort the strings into pattern order.
Because each fold produces two strings of one color, this start pairs naturally with mirrored patterns. A chevron friendship bracelet with four colors needs exactly four folded strings.
Braided loop start
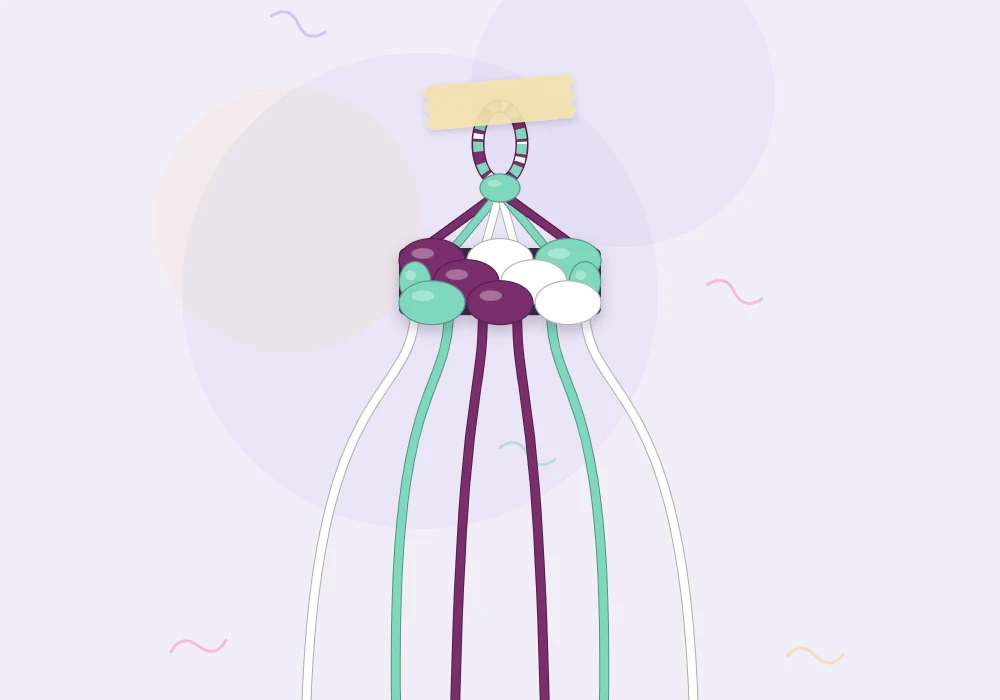
A braided loop is the neatest and strongest version. The loop is a small braid instead of loose threads, so it keeps its shape and does not snag.
- Cut half as many strings at double length, plus about 2 in (5 cm) extra.
- Find the middle of the bundle. Tape the bundle to the table about 3/4 in (2 cm) to one side of the middle.
- Divide the strings into three groups and braid for about 1.5 in (4 cm), so the braid is centered on the middle of the strings.
- Remove the tape, fold the braid in half to form a loop, and bring all the strings together below it.
- Tie an overhand knot with all the strings directly under the loop, or bind them with one row of the pattern’s knots.
Tip
Test the loop before you start knotting. Pinch two braided cords, or the button you plan to use, and check that they pass through with slight resistance. A loop that is too large lets the bracelet slip open.
Anchoring: tape, clipboard or safety pin
Knots only sit evenly when the strings are under light tension, so the top of the bracelet has to be fixed to something.
- Tape: Press a strip of masking or painter’s tape across the strings just above the top knot and stick it to a table. It is quick and costs almost nothing. Tape loosens as you pull, so press it down again every few rows or add a second strip.
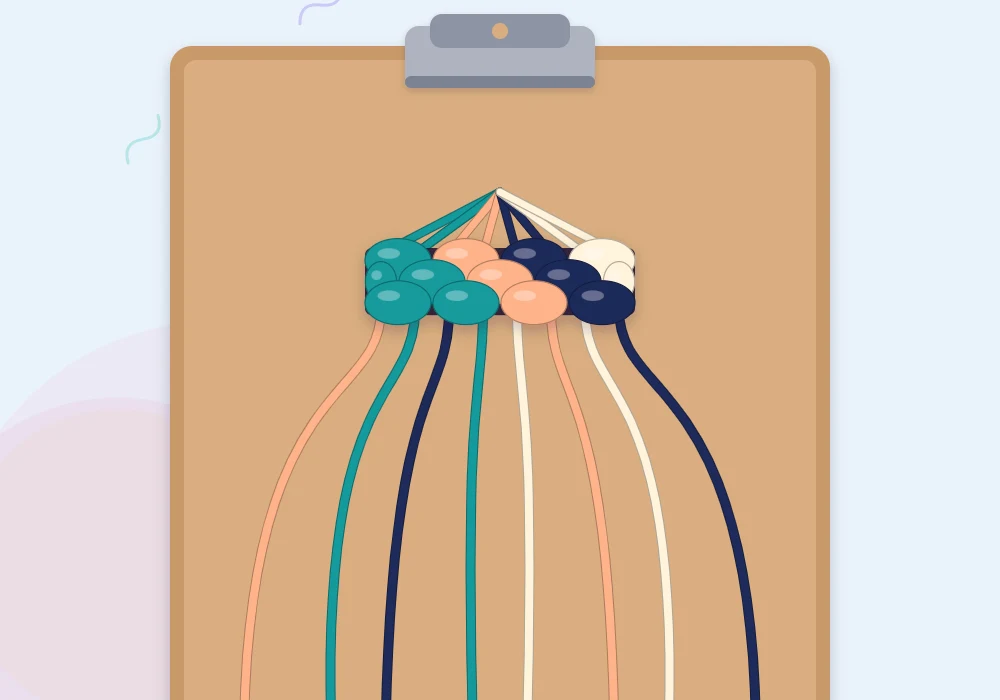
- Clipboard: Slide the knot or loop under the clip. A clipboard holds firmly, travels well, and lets you stop mid-row and pick the work up later. A strip of tape across the bottom of the board can hold strings in order between sessions.
- Safety pin: Push a pin through the top knot or loop and fasten it to a cushion, a bag or the knee of your jeans. This gives the firmest pull and works anywhere, though a pin can leave a small hole in fabric.
Watch out
Anchor above the knot, never below it. If the clip or tape sits on the working area, the first rows are knotted around a lump and will stay loose when the anchor comes off.
Which start should you choose?
For a very first bracelet, tie an overhand knot and tape it down. It takes a minute and lets you concentrate on the knots; the wider setup is covered in friendship bracelets for beginners. Once the knots feel comfortable, a folded loop saves cutting time, and a braided loop is worth the extra few minutes for a gift.
The start also decides how the other end is finished. A knot at the top means two sets of ties; a loop at the top means the far end needs ties or a button to pass through it. The matching finishes are explained in how to end a friendship bracelet.
Frequently asked questions
What is the easiest way to start a friendship bracelet?
Tie all the strings together with one overhand knot about 3-4 in (8-10 cm) from the top and tape the work to a table. The loose ends above the knot become a tie later.
How big should the loop be on a loop start?
About 1/2 in (1.3 cm) long, or just large enough for two braided ties or your button to pass through with slight resistance.
Is tape or a clipboard better for holding a bracelet?
A clipboard grips more firmly and is portable, so it suits longer projects. Tape is fine for a quick bracelet at a table but needs pressing down again as it loosens.
Can any pattern use a loop start?
Any pattern with an even number of strings in pairs of colors can. If a pattern needs an odd number of one color, cut that string singly and tie it in with an overhand knot start.


