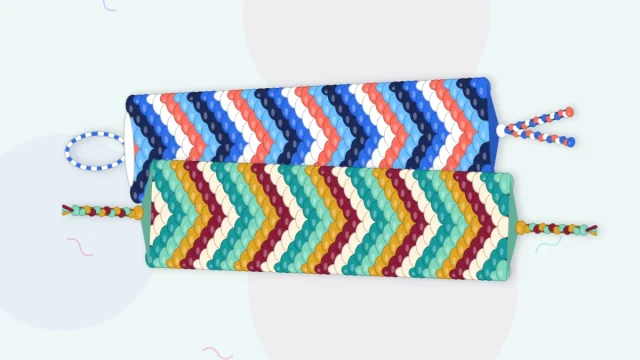
How to Make a Chevron Friendship Bracelet
Learn the classic chevron friendship bracelet with eight strings in four colors: the mirrored setup, knotting each side toward the middle, and the center knot that forms every V.

Tutorial at a glance
Materials
- Embroidery floss in 4 colors
- Scissors
- Ruler or tape measure
- Tape, a clipboard or a safety pin
A chevron friendship bracelet is the row of stacked V shapes that most people picture when they think of knotted floss jewelry. It looks intricate, but it is built from only two knots and one repeating row, which makes it a natural second project after a diagonal stripe. This tutorial uses eight strings in four colors and walks through the mirrored setup, the trip from each edge to the middle, and the single center knot that joins the two halves.
How a chevron is built
A chevron is two diagonal stripes that lean toward each other. The left half is knotted exactly like a candy stripe bracelet, with forward knots traveling from the left edge toward the middle. The right half is its mirror image, with backward knots traveling from the right edge toward the middle. Where the two working strings meet, one extra knot ties them together and forms the point of the V.
Because the two halves must match, the strings are arranged in mirrored order. With four colors called A, B, C and D, the order reads A B C D D C B A. The outer pair always does the knotting, so the color on the outside is the color of the next V.
Supplies and string lengths
- 6-strand cotton embroidery floss in four colors, used whole. This tutorial uses plum, coral, sun yellow and mint.
- Scissors and a ruler or tape measure.
- Tape, a clipboard or a safety pin to anchor the top.
Cut two strings of each color, about 36 in (91 cm) long, for eight strings in total. If you prefer a loop at the top, cut one string of each color at 72 in (183 cm) instead and fold the bundle in half. A chevron uses its strings evenly, because every color takes a turn as the working pair, so all eight can be the same length.
Set up the mirrored order
Tie the eight strings together with an overhand knot about 3 in (8 cm) from the top, then tape the knot to a table or clip it to a clipboard. Fan the strings out flat and sort them from left to right: plum, coral, sun, mint, mint, sun, coral, plum. Check the order twice before the first knot. A swapped pair at this stage produces a lopsided V that only shows up several rows later.
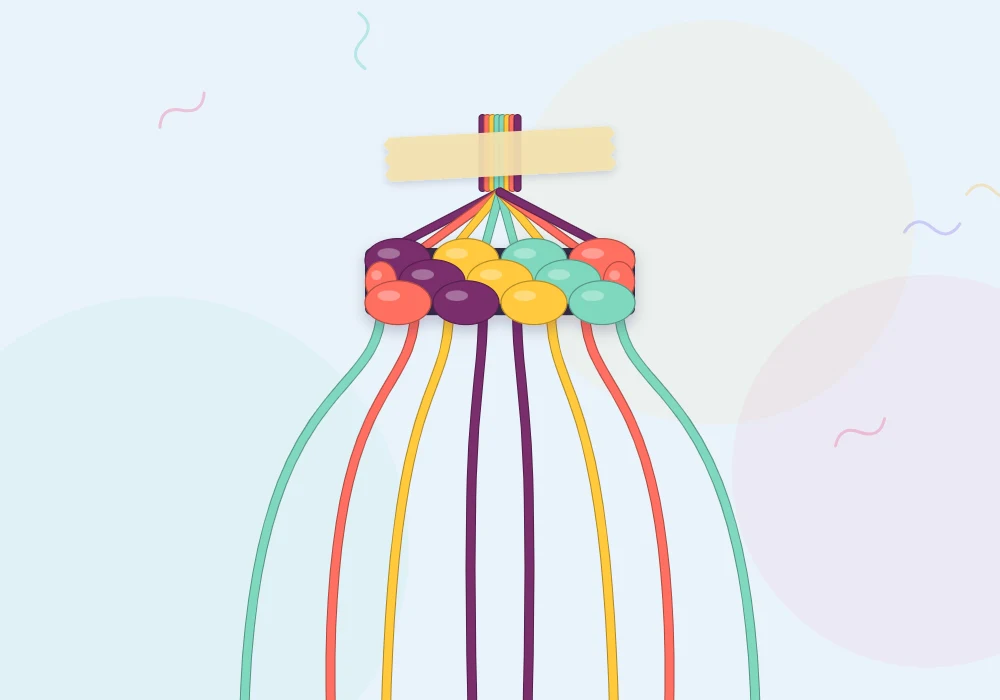
Knot the first row
Each chevron row has three parts: the left half, the right half and the center knot. If you need a refresher on the two knots, see the guides to the forward knot and the backward knot. Each one is two half hitches tied with the same string.
- Left half. Pick up the left plum string. Tie a forward knot over coral, then a forward knot over sun, then a forward knot over mint. The plum string now sits just left of the middle.
- Right half. Pick up the right plum string. Tie a backward knot over coral, then over sun, then over mint. This plum string now sits just right of the middle.
- Center knot. The two plum strings are side by side. Tie one forward knot with the left plum string over the right one. A backward knot works just as well, since both strings are the same color. Pick one and use it for every row.
That is one complete V: three knots, three knots and one in the middle, seven in all. The string order is now coral, sun, mint, plum, plum, mint, sun, coral.
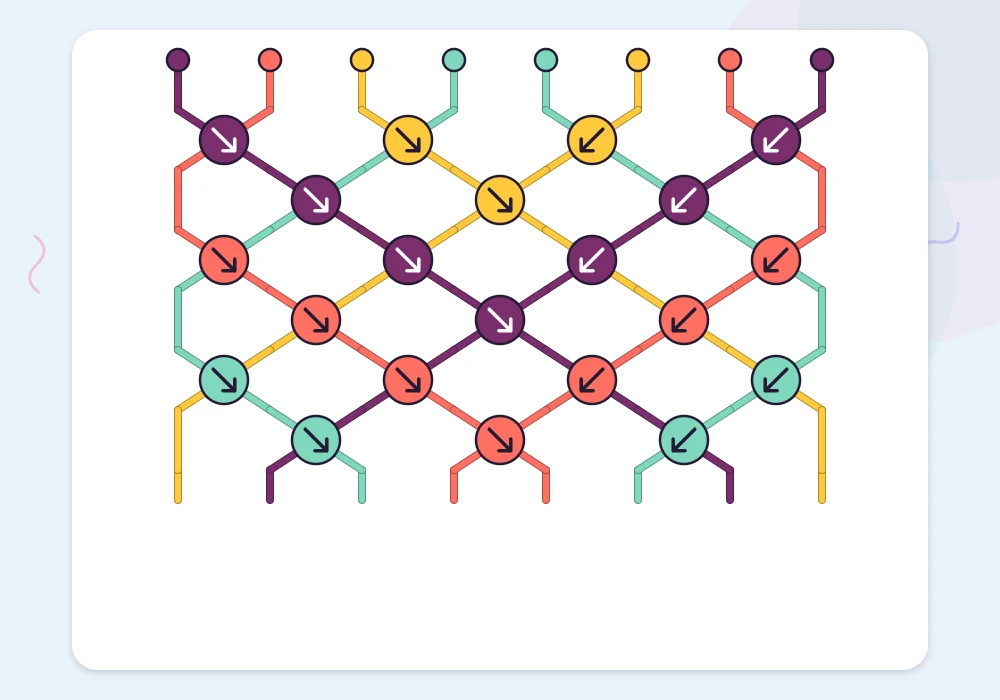
Repeat with the new outer color
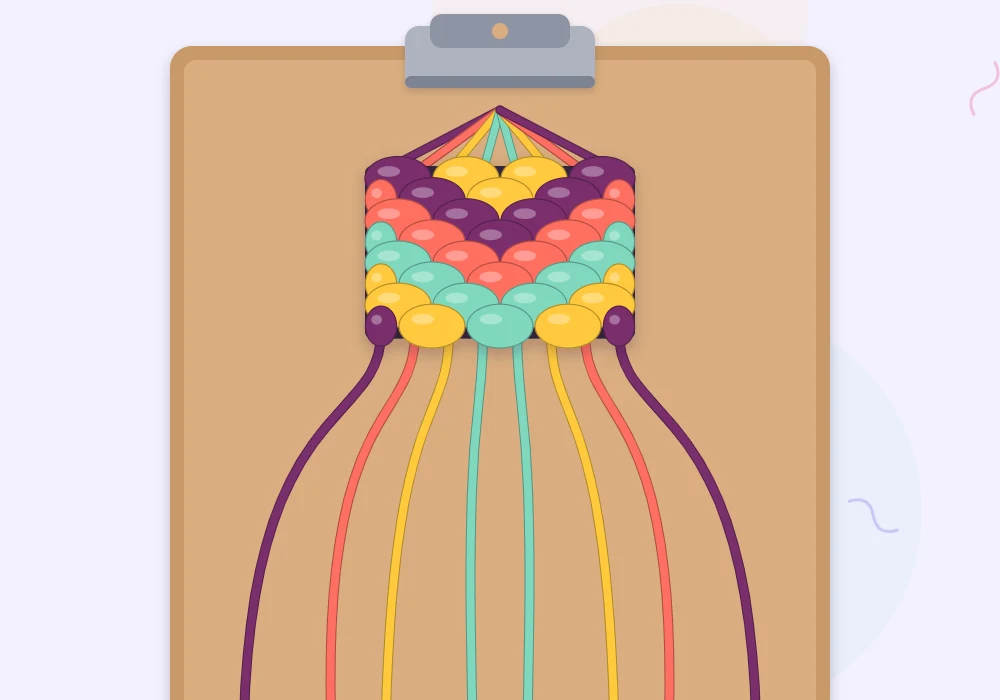
Coral is now on the outside, so coral makes the second V. Work the same three parts: left coral string forward across sun, mint and plum; right coral string backward across the same three colors; center knot. Then sun takes its turn, then mint. After four rows the strings are back in their starting order and plum is on the outside again.
There is no need to memorize a color sequence. The rule never changes: take the two outer strings, knot each one to the middle, join them. If you would like to follow the pattern on paper as well, the same row is easy to spot once you know how to read a knot chart.
Tip
Stopping in the middle of a row is the easiest way to lose your place. Finish the center knot before you put the bracelet down, and the next step is always “start with the outside pair.”
Getting a sharp, even V
The first few rows of a chevron often look rounded, more like a smile than a point. That is normal at the top, where the knots have nothing above them to sit against. Three habits sharpen the shape quickly:
- Slide each knot up and inward. Pull the first half hitch snug against the row above, aiming toward the center, before tying the second half hitch.
- Hold the neighbor string taut. The string being knotted over should run straight down. If it goes slack, the knot twists and the diagonal wobbles.
- Match your halves. Most people pull harder with one hand. If one arm of the V is steeper, ease off on that side for the next row instead of yanking the other.
Watch out
Skipping the center knot leaves a small hole and lets the two halves drift apart. If a V looks split down the middle, count the knots in that row. There should be seven with eight strings.
How long to knot and how to finish
Knot until the patterned section wraps around the wrist with a small gap, usually about 5.5 to 6.5 in (14 to 16.5 cm) for teens and adults. Plan on about 1.5 to 2.5 hours for a first try. End on a completed row, tie all eight strings in an overhand knot, and braid or twist the leftover tails into ties.
Once the eight-string version feels comfortable, the same row scales up without any new knots. A wide chevron with 10 or 12 strings simply adds more knots to each half. For some background on where these knotted bands come from, the friendship bracelet article on Wikipedia gives a short history.
Frequently asked questions
How many strings do you need for a chevron friendship bracelet?
A chevron needs an even number of strings in mirrored order. Eight strings in four colors is the classic size, but six strings in three colors also works and is slightly faster.
Why does my chevron look rounded instead of pointed?
The first rows are always a little curved because there is nothing above them to sit against. Pull each knot up and toward the center, keep the string underneath taut, and the V sharpens after three or four rows.
Do I have to tie the center knot on every row?
Yes. The center knot joins the left and right halves. Without it the row has a small gap in the middle and the two sides slowly separate.
Can I use a loop start for a chevron?
Yes. Cut one string of each color at double length, fold the bundle in half, tie a loop, and then arrange the eight strands in mirrored order before the first row.